Lab-Aids now offers LTI 1.3 integration with Schoology. This page contains instructions for Schoology Admins to set up a new LTI 1.3 Developer App in Schoology and install for teachers/students. Please refer to Schoology's LTI Apps Support and Documentation for more information.
Note for Admins: The LTI integration will not be live until Schoology Admin provides Lab-Aids with the App's Client ID and Lab-Aids enters it into the platform's internal LTI 1.3 setup.

LTI 1.3 Schoology Admin Setup Instructions:
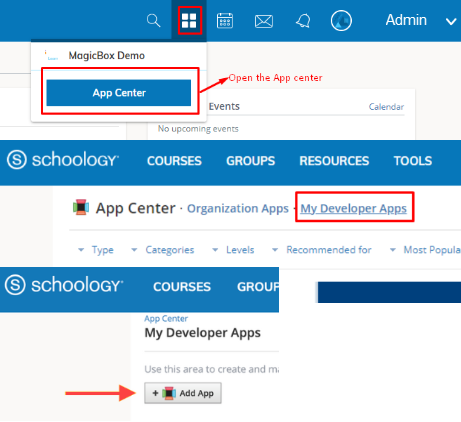
Log into your Schoology admin account. Click the App Center >> My Developer Apps >> +Add App.
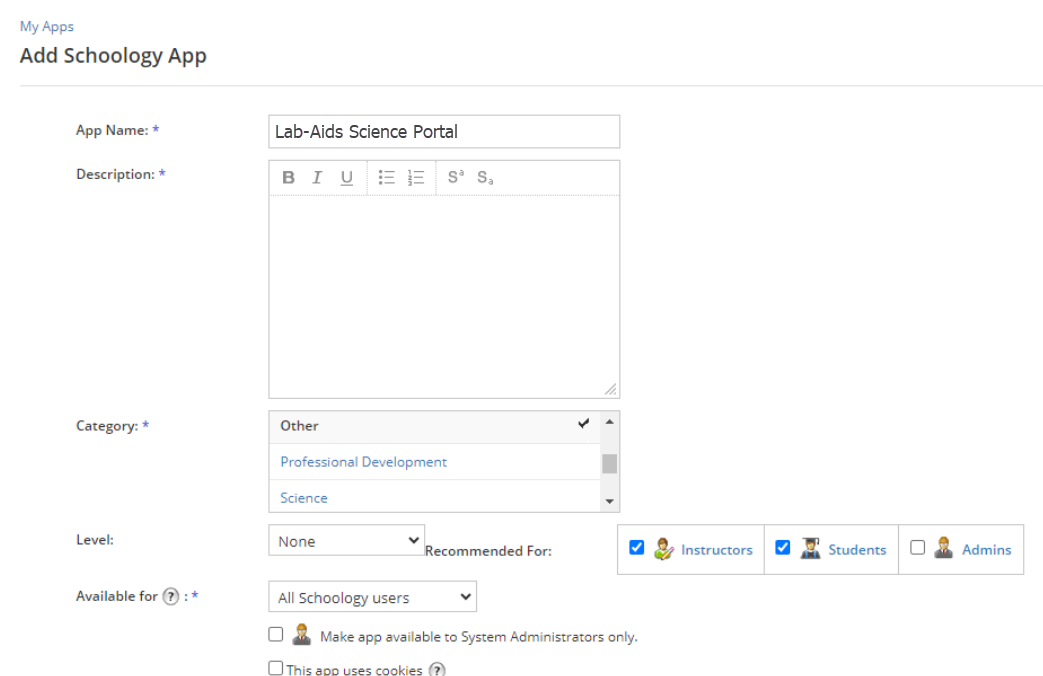
2. Enter the app info:
- App Name: Lab-Aids Science Portal
- Available for: All Schoology users
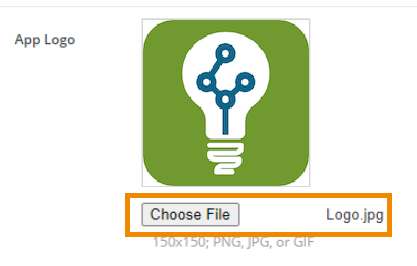
- App Logo: Download our logo here and upload it as the App Logo: https://www.lab-aids.com/sites/default/files/2024-12/labaids-science-app-150x150.png
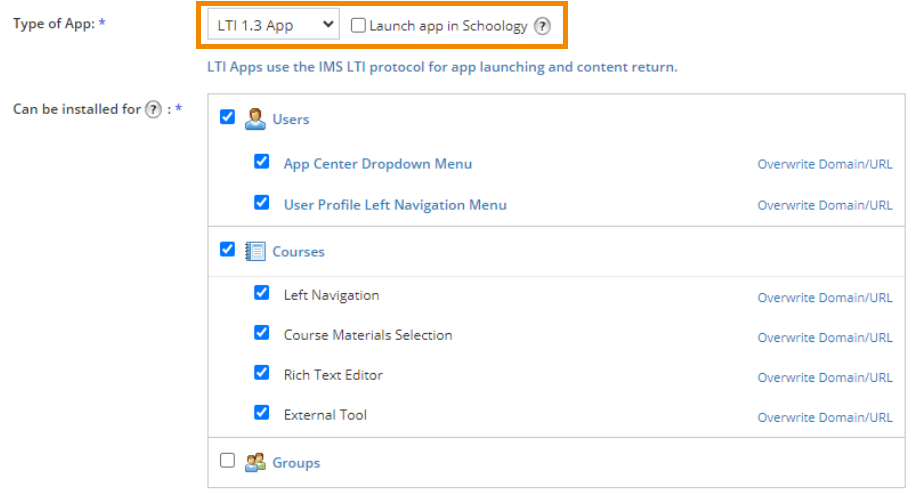
- Type of App: LTI 1.3 App
- Launch app in Schoology: Our recommendation is to not select this checkbox.
- For best performance, we recommend launching the Lab-Aids Portal in a new tab as opposed to in an iFrame within Schoology.
- Can be installed for: Select desired options for Users, Courses, and Resources.
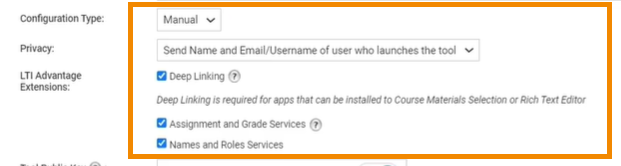
- Configuration Type: Manual
- Privacy: Preferred option is "Send Name and Email/Username of user who launches the tool". Next preferred is "Only send Email/Username of user who launches the tool".
- LTI Advantage Extensions: Select all three checkboxes for "Deep Linking", "Assignment and Grade Services", and "Names and Roles Services".
- Tool Public Key: Leave blank
- JWKS URL: Enter “Keyset URL” from Lab-Aids
- Domain URL: Enter “Launch URL” from Lab-Aids
- Custom Parameters: Leave blank for now
- OIDC Login Init URL: Enter “Login Initiation URL” from Lab-Aids
- Redirect URLs: Enter “Launch URL” from Lab-Aids
- Do not select “Require System Administrators to configure settings for this App”
- Click the checkbox to agree to the terms of use
- Click “Submit”

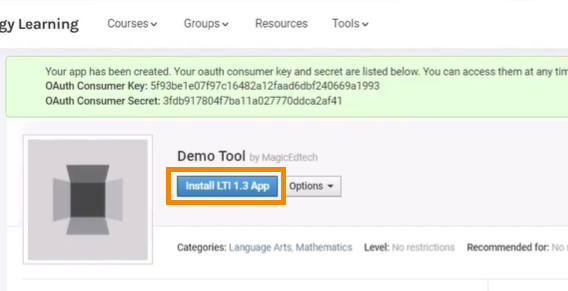
3. Once the app is added, click "Install LTI 1.3 App" on the next screen and proceed through the following permission screens to install for the organization.
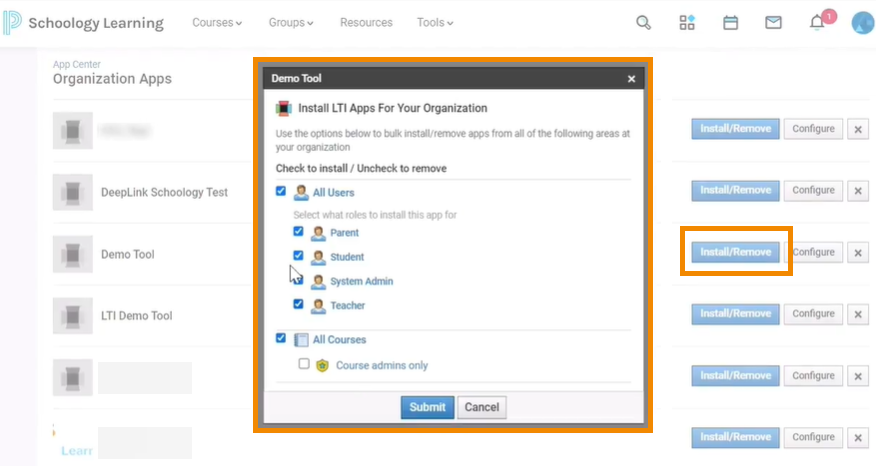
4. Then, from the App Center, click "Install/Remove" to confirm installation choices for the app (All Users, All Courses, All Groups, All Resources). Click Submit.
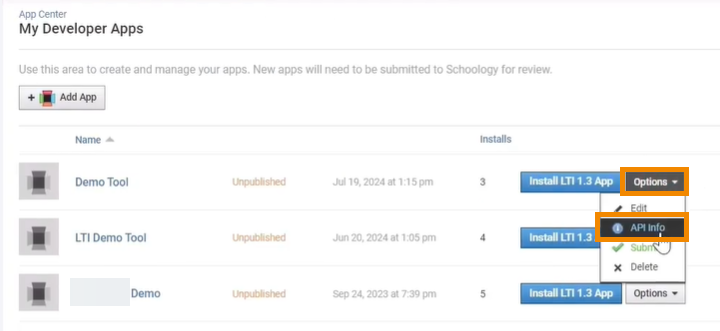
5. From the App Center, click Options >> API Info. Copy the Client ID.
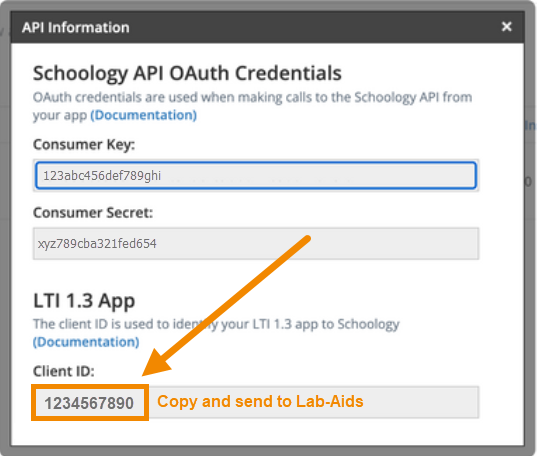
6. Then, send the Client ID to Lab-Aids. Do not forget this step.
LTI Tool will not be live until Lab-Aids confirms the Client ID has been added into the Lab-Aids Portal internal LTI Setup.
7. Once Lab-Aids confirms the tool has been added on their end, test the tool by attempting to access it from your admin account, a teacher account, and a student account.
- Clicking on the Lab-Aids Science Portal tool from your admin account.
- Then, continue testing by clicking on the tool from both a teacher and student account.
- In all cases, user should be auto-logged into the Lab-Aids Portal account. Admin and teachers will see content in their libraries.
8. Once testing is successful, Schoology admin needs to provide instructions and resources to teachers:
- How to add tools to their specific classes
- Click on the tool to be logged into their accounts.
- Teachers will need to assign books to students.
- Resources to share with teachers:
- Portal Navigation for Teachers: https://www.lab-aids.com/portal-20-basic-navigation-teachers
- Portal Navigation for Students: https://www.lab-aids.com/portal-20-basic-navigation-students
- Portal FAQ Page: https://www.lab-aids.com/portal-faq
- LTI 1.3 Deep Linking: https://www.lab-aids.com/lti-13-deep-linking
- LTI 1.3 Grade Passback: https://www.lab-aids.com/lti-13-grade-passback
Back to Lab-Aids Science Portal FAQ Page
Questions? portals@lab-aids.com