A bulk update allows admins to change class associations of students/teachers in bulk using a csv/xls template. Bulk update will clear the current class associations and replace them with the new class associations.
Helpful Hints:
- If you only have a few teachers to update, you can just manually update each teacher instead of bulk updating teachers (Roster > Teacher > "Edit" button > Select new class titles).
- Student and teacher bulk update processes are the same, except each is located within its own menu (Roster > Teacher vs. Roster > Student).
Steps to complete bulk update:
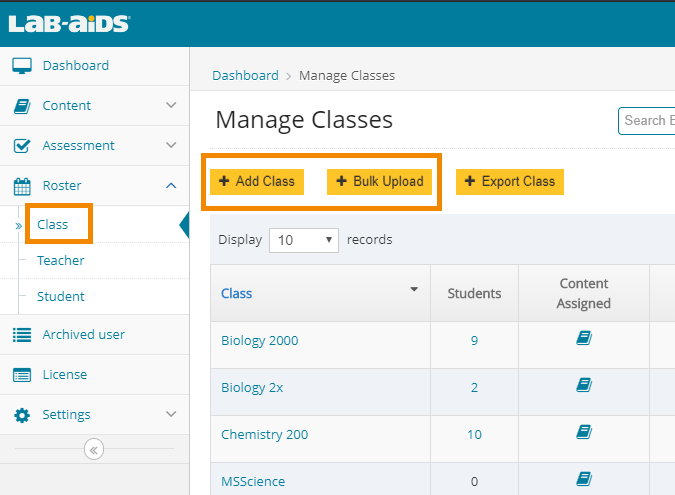
1) Roster the new class titles into the portal.
- Manual Entry: Roster > Class > Add Class
- Bulk Class Upload: Roster > Class > Bulk Upload
2) Download the Bulk Update template.
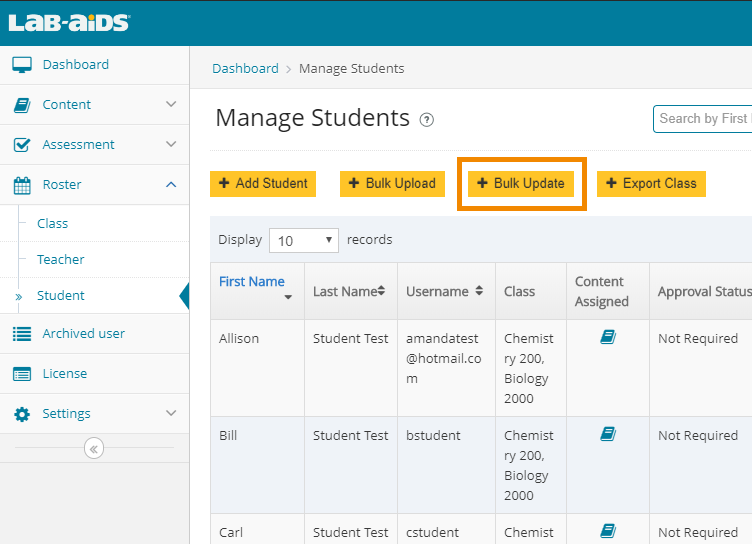
- For student bulk update, go to Roster > Student > Bulk Update.
- For teacher bulk update, go to Roster > Teacher > Bulk Update.
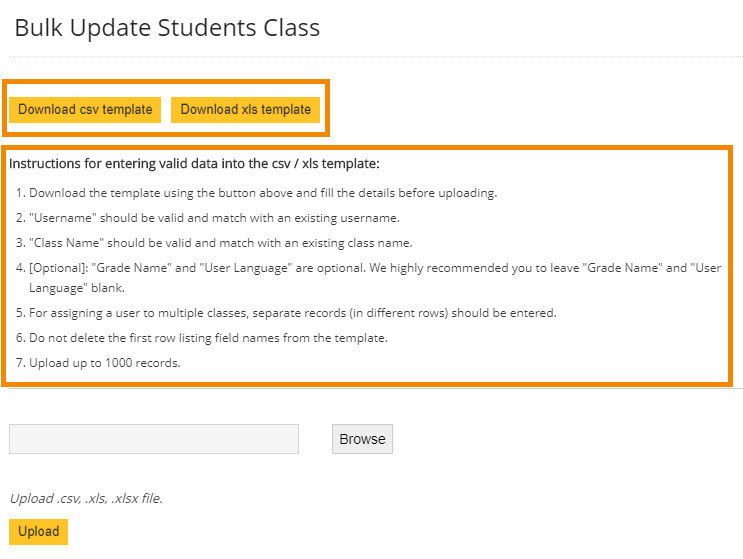
- Click "Bulk Update" to download the template to complete the bulk update.
- Read the instructions below the template download button, as these will help you have a successful upload.
- Leave "Grade" and "User Language" columns blank.
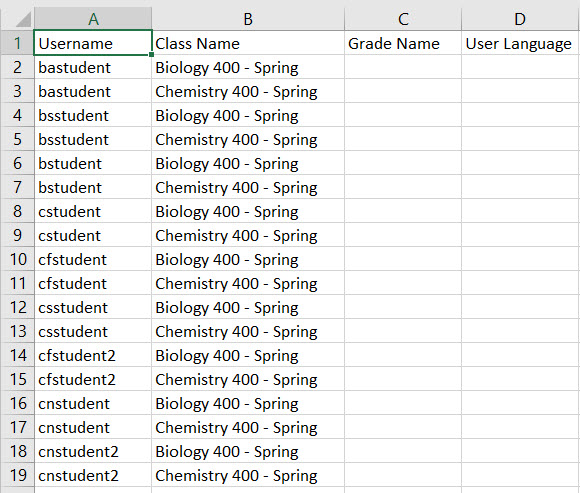
3) Fill out the template with your students or teachers, making sure to follow the instructions on the screen. Save.
- Important: If users need to be associated with more than one class, you must enter users in a separate row for each additional class. This is different than your initial bulk upload document (comma separated classes).
- Leave the "Grade Name" and "User Language" columns blank.
- Do not delete column titles.
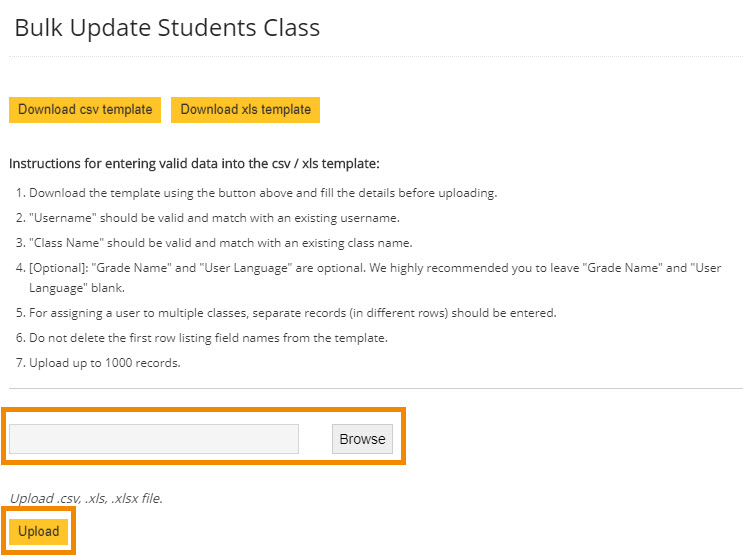
4) Upload "bulk update" document after clicking on "browse" to select the file.
- Check your email for a status email from noreply@lab-aids.com. This email will inform you of the success of the upload and will provide detail on any errors.
5) Check data for accuracy.
- Roster > Class, Click on class names to view list of students associated with each class.
- Or Roster > Student / Roster > Teacher, check class titles of the users updated.
Questions? Email portals@lab-aids.com